
Your character walks slowly to the left on their own. The camera creeps upward in every shooter. Menus scroll by themselves. That’s stick drift, and it’s the most common controller problem we fix at our Omaha and Lincoln repair benches. It affects Nintendo Joy-Cons, PS5 DualSense controllers, Xbox Wireless Controllers and even expensive “pro” pads.
The good news is that drift is very fixable. Here’s why it happens, which home fixes are worth trying, which ones to skip, and when a repair or upgrade makes sense.
Why analog sticks drift
Most stock controllers use potentiometer sticks. Inside each stick module, two small wiper contacts rub along carbon resistive tracks, one for the X axis and one for the Y axis. The controller reads stick position from the resistance at the wiper.
Over thousands of hours, three things go wrong:
- Wear: the wipers grind the carbon tracks down, especially around the center where the stick spends most of its time. The readings stop returning to a true “zero.”
- Debris: dust, skin flakes, crumbs and the carbon dust from that wear get into the module and cause erratic readings.
- Spring fatigue: the centering springs lose tension, so the stick doesn’t snap back to the exact middle.
Software dead zones hide small errors, but once wear pushes the error beyond the dead zone, you get drift. That’s why drift usually starts mild and gets worse.
Free fixes worth trying first
1. Update and recalibrate
- Switch: System Settings → Controllers and Sensors → Calibrate Control Sticks. Also update the controller firmware under Update Controllers.
- PS5: update the DualSense firmware (Settings → Accessories → Controllers). The PS5 has no system-wide stick calibration, but many games let you raise the dead zone.
- Xbox: update the controller in the Xbox Accessories app. Some games and the Accessories app let you adjust dead zones on supported controllers.
Calibration helps when the problem is a small center offset. It doesn’t fix a worn track.
2. Compressed air around the stick base
Tilt the stick fully to one side and give short bursts of air into the gap under the cap, then rotate it and repeat. This can clear debris-related drift for a while. Hold the can upright so you don’t spray liquid propellant into the controller.
Skip: spraying cleaner into the gap
You’ll find videos telling you to drip isopropyl alcohol or contact cleaner around the stick. It sometimes helps for a day or two by flushing debris, but it can also wash grime deeper into the module and strip the lubricant the stick needs. If you’re at the point of soaking the controller, it’s time for a new module.
The real fix: replace the stick module
A drifting stick is a worn mechanical part, and the permanent fix is to replace it. How hard that is depends on the controller:
- Joy-Con: the stick module connects with a small ribbon cable. Joy-Cons are tiny, with fragile ribbon connectors and a tight battery fit. It’s very doable for a tech, but easy for a first-timer to damage.
- Switch Lite: the sticks are built into the console, so you can’t replace a Joy-Con. The console has to be opened, which is one more reason repair beats replacement on a Lite.
- PS5 DualSense and Xbox controllers: the stick modules are soldered to the board, with multiple through-hole joints per module. A clean swap needs proper desoldering equipment. Pulling a stick out with a basic iron is a common way to tear pads and ruin a controller.
Hall-effect and TMR sticks: drift-resistant upgrades
When we replace a stick we can upgrade it rather than fit another wear-prone potentiometer. There are two magnetic options:
- Hall-effect sticks use a magnet and a Hall sensor to read position with no rubbing contacts. Nothing wears out the way carbon tracks do.
- TMR (tunnel magnetoresistance) sticks also sense position magnetically, but they typically use less power than Hall-effect sensors (which matters for battery life on wireless controllers) and offer fine resolution.
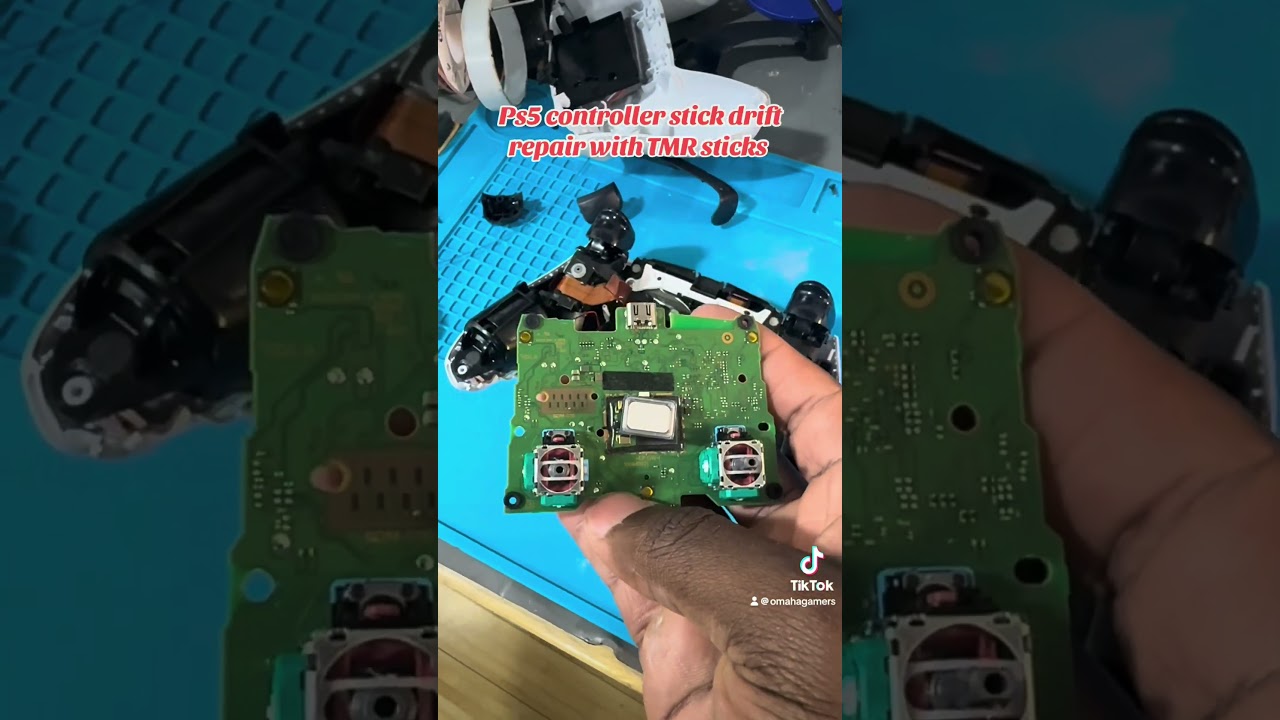
We dig into the differences in Hall effect vs TMR sticks for the PS5 controller. Here’s a TMR upgrade on a DualSense from our channel:
And on an Xbox Series controller:
Magnetic sticks don’t make a controller indestructible. Buttons, triggers, batteries and charge ports still wear. But they remove the single most common failure point.
Repair, upgrade or replace? A practical way to decide
- Controller in good shape apart from drift: repair it, and consider a TMR or Hall upgrade so it doesn’t come back.
- Drift plus a dead battery, broken charge port or cracked shell: get a quote for the whole job. Sometimes it’s still worth it, sometimes not. We’ll tell you honestly at diagnosis.
- Special editions, Edge or Elite controllers: almost always worth repairing.
- Still under manufacturer warranty: contact Nintendo, Sony or Microsoft first. Opening the controller elsewhere can affect that warranty.
How long does a repaired stick last?
A new standard potentiometer stick is basically a factory-fresh part. How long it lasts depends on how you play. Competitive shooter players who make constant small aim corrections wear sticks much faster than someone who mostly plays RPGs. Magnetic (Hall-effect or TMR) sticks don’t have the carbon tracks that cause classic drift, so for heavy players the upgrade usually pays off. Either way, keep snacks away from the controller, store it somewhere it won’t collect dust, and don’t rest it face-down on the sticks. Constant pressure on the sticks speeds up wear.
Other things that feel like drift (but aren’t)
- Bluetooth interference: stuttery, laggy input near Wi-Fi routers or USB 3 hubs. Move closer or use a cable to test.
- Low battery: some controllers behave erratically below roughly 10% charge.
- A second controller still paired and getting bumped on the couch. Yes, really.
- In-game aim assist or gyro aiming on Switch and PS5 can feel like drift if motion controls are on.
Get your controller fixed in Omaha or Lincoln, or by mail
Omaha: bring it to our Omaha location for same-day repair. Questions? Call or text (402) 703-4403. Diagnosis is free, and if the item can’t be repaired there’s a $40 fee.
Lincoln: bring it to Game Repair Shop inside Gamers at 2711 King Ln, Ste 202 (Mon–Wed 12–7, Thu–Sat 12–8, Sun 12–7). The $25 drop-off fee is credited toward your repair, and turnaround is 3–5 days.
Sioux City, Council Bluffs, Grand Island, Kearney or farther: see options for out-of-town customers, or mail it in (free diagnosis, $40 if it can’t be repaired, 3–5 days after arrival, free return shipping). Every repair carries a 30-day limited warranty.